There’s nothing like noticing a dent, scrape or hairline crack just after you’ve finished painting. Grabbing a tub of filler and “doing a quick patch” feels sensible—until the area bubbles, lifts or cracks again a month later. Worse still, repeated touch-ups can trap moisture, hide structural movement and turn a cosmetic hiccup into a costly repair. Before you reach for the putty knife, walk through the most frequent errors homeowners make, the bigger issues those errors can trigger, and the safer ways to get your walls back to a flawless finish. If at any point you suspect the damage runs deeper than surface cosmetics, Sydney’s plastering specialists can assess and repair the substrate before things escalate.
1. Why Small Plaster Patches Go Wrong So Often
Plaster, whether traditional wet plaster or modern Gyprock joint compound, isn’t just a white paste that dries hard. It relies on:
• Sound substrate—no loose paper, crumbling masonry or hidden moisture
• Correct layering—base coat for strength, finish coat for smoothness
• Even drying—too fast and it cracks; too slow and it powders
• Compatible paint systems—primer between patch and top coat prevents flashing
DIY kits rarely explain the science. Skip even one of the above, and you can end up with hollow-sounding repairs, stained paint, or recurring cracks that creep across an entire wall. Understanding where most patch jobs fail helps you avoid compounding the problem.
2. Common DIY Patching Mistakes and Their Hidden Consequences
Below is a quick comparison of the slip-ups tradies see most often when called to “fix the fix.”
| Mistake | What Seems to Happen | Underlying Issue | Safer Fix |
| Skipping surface prep | Filler looks smooth at first | Dust, oil or old paint stops adhesion | Lightly sand, clean with sugar soap, and let dry fully before patching |
| Using an interior compound on damp areas | Patch powders or flakes | Moisture migration or bathroom steam | Identify the moisture source, use a water-resistant base coat, and apply sealer |
| Applying thick, single-coat filler | Patch shrinks or cracks | Differential drying and internal stresses | Build in thin layers (≤3 mm), allow full drying between coats |
| Forgetting to prime the patched area | Top coat flashes (different sheen) | Porous patch absorbs paint unevenly | Spot-prime with acrylic sealer undercoat |
| Over-sanding the edges | Bowl-shaped depression visible | Weakened edge meets original wall | Feather gently, use a broad knife to blend before sanding |
| Painting too soon | Patch cracks under the paint skin | Filler still curing, trapped moisture | Follow manufacturer drying times; extend in winter or high humidity |
| Ignoring recurring hairline cracks | The repaired line reappears | Movement from framing, temperature or poor joint taping | Investigate cause before cosmetic repair; reinforce joint if needed |
| Using the wrong fastener repair | Nail or screw pops return | Inadequate stud bite or seasonal movement | Replace with longer screws/nails, set slightly below surface, patch over |
A rushed patch may look “fine” for a week, only to fail once Sydney’s temperature swings or summer humidity move the substrate. Recognising these early warning signs saves rework—and frustration—later.
3. Quick Inspection Checklist Before You Grab the Filler
- Press lightly around the defect—does the surface feel hollow or move?
- Check for damp staining, mould or a musty smell.
- Note the crack’s angle: horizontal or vertical hairlines often follow framing; diagonal lines can hint at settlement.
- Tap the surrounding area; a dull thud can mean detached plaster.
- Look for nearby nail pops, bubbling paint or swollen skirting—all clues to broader movement or moisture.
If two or more red flags appear, treat the problem as more than skin-deep.
4. Minor Touch-Up or Deeper Repair? A Simple Decision Guide
| Situation | Likely Cause | Suggested Action |
| Tiny dent, no cracks, wall feels solid | Accidental impact | Light fill & sand, prime, paint |
| Hairline crack ≤1 mm, stable | Seasonal expansion/contraction | Scrape V-groove, tape if on a joint, fill in layers, prime |
| Repeated hairline crack in same spot | Underlying movement | Reinforce joint tape or add control joint; consider professional inspection |
| Diagonal crack wider than 2 mm | Possible structural shift | Stop cosmetic work; get professional assessment |
| Patch feels hollow or sounds drummy | Delaminated plaster | Remove loose area, re-key or re-screw board before patching |
| Moisture staining around defect | Leak or condensation | Fix moisture source, allow full drying, use moisture-resistant system |
Use this chart to decide whether DIY patching is reasonable or whether deeper investigation should come first.
5. Sydney-Specific Factors That Trip Up DIY Patch Jobs
Sydney homes face unique environmental pressures:
• Humid coastal air can keep internal walls damp for longer after rain, delaying proper cure times.
• Older terrace houses often have solid plaster over brick; moisture can wick through porous mortar and blow off surface repairs.
• Gyprock in newer apartments expands and contracts with air-conditioning cycles—hairline cracks near HVAC outlets are common.
• Sandstone footings and reactive clay pockets in some suburbs make walls move subtly between dry and wet seasons.
NSW Fair Trading’s home building and renovating guidelines suggest addressing moisture and structural movement before cosmetic finishes. Factoring these local realities into your repair plan helps patches blend and last.
6. What Not to Ignore: Red Flags That Call for Professional Assessment
• Cracks wider than a 20-cent coin or that widen over weeks
• Diagonal fissures from door or window corners—possible footing movement
• Soft, crumbly plaster when scraped back beyond the immediate defect
• Recurrent nail pops along a straight line—indicates framing shift
• Brown or yellow staining, even if dry—old leaks can flare up again
• Hollow-sounding areas larger than a dinner plate
If you notice any of these, pause the DIY approach and read up on why wall patches crack later to understand the mechanics before deciding on a fix.
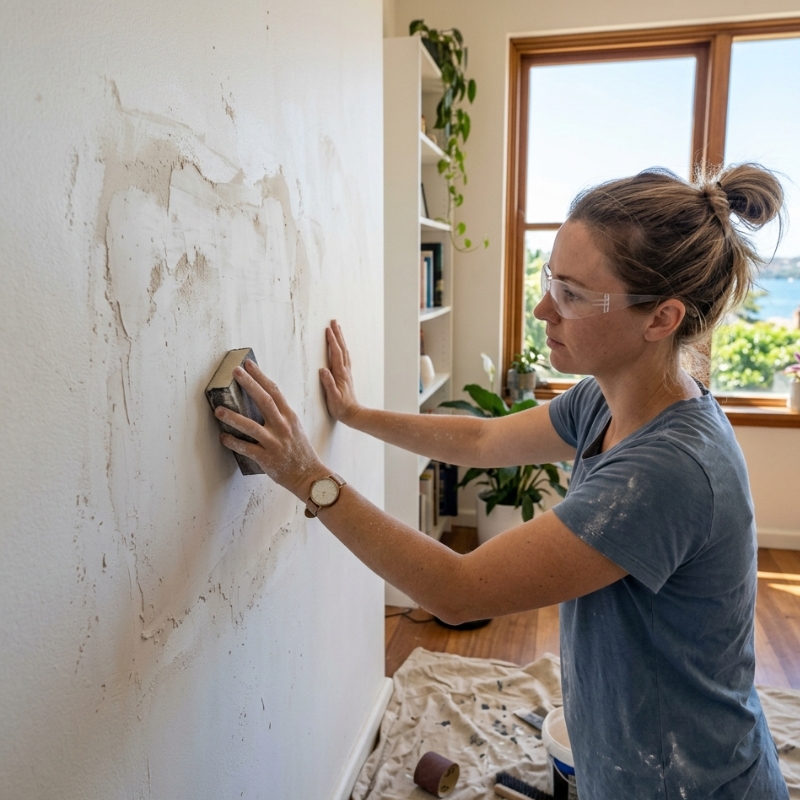
7. Safer DIY Techniques If You Still Want to Patch Yourself
7.1 Choose the Right Compound
• Use lightweight premix for small indentations.
• Use setting-type powder compound (45-minute or 90-minute) for deeper repairs—it shrinks less.
• Bathroom or laundry? Opt for moisture-resistant base and top coats.
7.2 Layer Thin, Let Dry
Build the patch in no more than 3 mm layers. A hair dryer on low can speed surface drying, but full cure still takes time—read the label.
7.3 Feather, Don’t Dig
Keep the knife at a slight angle and pull away from the centre to avoid gouging edges. Feather at least 150 mm beyond the defect for invisibility.
7.4 Prime Before Top Coat
Acrylic sealer undercoat locks in the filler’s porosity. Without it, sheen differences appear even under two top coats.
7.5 Sand Smart
Use a sanding block or pole sander with 180-220 grit. Power sanders can create hollows in seconds; stay manual unless you have solid experience.
8. Questions That Help You Understand a Professional’s Repair Approach
- How will you identify and address the root cause (movement, moisture, substrate failure)?
- What products and drying times do you use for Sydney’s humidity?
- Will you reinforce cracks with tape or a mesh system?
- How do you blend the new texture and sheen into existing paint?
- What warranties or workmanship guarantees do you offer on patch repairs?
A transparent answer to each shows whether the tradie’s method aligns with long-lasting results rather than a quick cover-up.
FAQs
1. Can I just use spackle instead of plaster compound?
Spackle (lightweight filler) is fine for tiny nail holes, but it lacks the strength and adhesion of plaster compounds for anything larger than a five-cent coin. On moving joints or deeper damage, spackle tends to crack and sink.
2. Why does my patch flash through even after two coats of paint?
Flashing happens when the patched area absorbs paint differently to the surrounding wall. A dedicated primer—or at least an acrylic sealer undercoat—balances porosity so the top coat cures with the same sheen.
3. How long should I wait before sanding a patch?
It depends on temperature, humidity and product type. Setting compounds list a “hard set” time (e.g., 45 minutes) but remain chemically active for hours. Premix tubs can take 12–24 hours. If the surface feels cool, it’s still evaporating water—wait.
4. Are hairline cracks in new apartments normal?
Yes, minor hairlines along joints often appear in the first year as the building settles. They can usually be taped and filled once movement stabilises, but widening or diagonal cracks deserve professional inspection.
5. Will waterproof paint stop moisture-related plaster damage?
Waterproof coatings may slow surface staining, but they rarely solve the moisture source. Fix leaks, improve ventilation or install vapour barriers first; otherwise the trapped moisture can push the paint—and new patch—off the wall.
Conclusion: Preserve the Finish, Not the Flaw
A flawless wall isn’t just about aesthetics; it protects the substrate, seals out moisture and maintains your home’s value. Small dents and cracks invite the “quick fix” mindset, yet the biggest plaster headaches in Sydney stem from rushed prep, wrong products and missed warning signs. Follow the safer steps above, respect curing times and don’t ignore movement or damp clues. If patches keep failing, professional assessment is the smarter next move—saving you repeated Sunday touch-ups and ensuring the repair blends seamlessly for years to come.